
How to create an email poll and add it to your email
Last updated
Polls let subscribers answer a question by clicking an option right inside your email. Each click records their vote and takes them to a thank-you page or a page you choose. This guide takes you from a new poll to a tested email.
Before you start
- Find your email platform's merge tag for a unique subscriber ID, such as
{{ person.KlaviyoID }}in Klaviyo or*|UNIQID|*in Mailchimp. Every poll needs one. See how the UID merge tag works if you're not sure which to use. - Some presets and settings depend on your plan. Anything locked shows an upgrade badge.
Step 1: Create the poll
- In the dashboard, open Tools and choose Polls.
- Click Create New.
- In Pick a Poll Preset or Start Fresh, choose a preset, or click Start with a blank canvas to build your own.
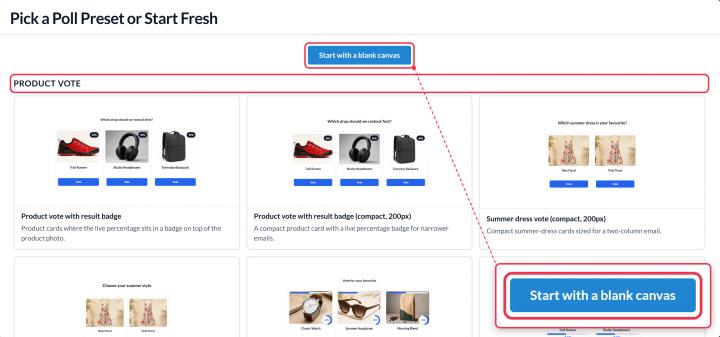
Presets come in three groups:
- Product vote: image options, some with live results. Good for "which one would you pick?" questions.
- Text: plain text answers, including Yes / No.
- Feedback: star ratings, emoji reactions, NPS (0 to 10) and 1 to 5 scores.
The preset also sets the type of poll, so pick the one closest to your question. Text presets are available on every plan; Product vote and Feedback presets need Standard or above, and NPS needs Power or above.
Step 2: Edit your options and question
The editor has three tabs: Option canvas, Question and Thank you page.
- Name your poll at the top so you can find it later. Subscribers don't see this name.
- Edit the answers in Poll Options on the left. Click a name to rename it, drag to reorder, and use Add Option for more. You can have up to 2 options on Free, 3 on Micro, 5 on Standard and 11 on Power and above.
- Change how each option looks on the canvas. See how to design your poll for text, images, shapes and live results.
- Add the question in the Question tab by turning on Include question above options. You can also write the question as normal text in your email instead, which stays readable when images are turned off.
Step 3: Add your UID merge tag
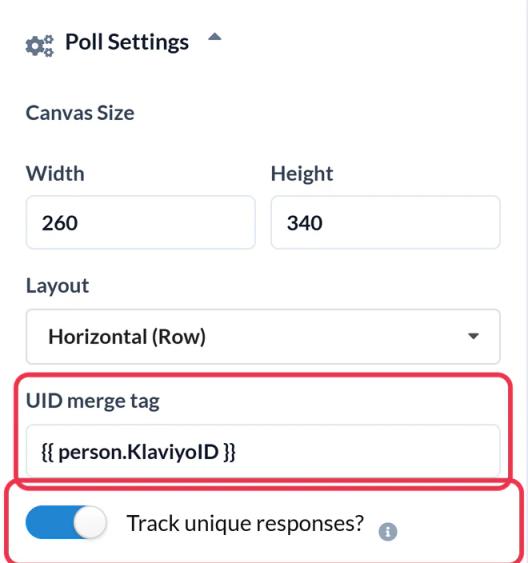
Open Poll Settings and paste your platform's merge tag into UID merge tag. Sendtric adds it to every option for you, so each subscriber gets one vote. If someone votes again, their new answer replaces the old one.
You can't copy the poll code until this is filled in. For the right tag for your platform and how to see who voted for what, read how to set up the UID merge tag.
Step 4: Choose where voters go
After Vote Landing Page in Poll Settings decides what happens after a vote:
- Hosted thank-you: a simple Sendtric page you edit in the Thank you page tab. Available on every plan.
- Custom URL: a page of your own for each answer. Available on Power and above.
Read how to choose what voters see after they vote for both options.
Step 5 (optional): Set an end date
On Power and above, turn on Poll End Date in Poll Settings and pick a Deadline and Timezone. After that time the poll stops accepting votes, and anyone who clicks sees a message that the poll has ended. Mention the closing date in your email so nobody is caught out.
Step 6: Save and add it to your email
- Click Save. Always save before copying, as code copied from an unsaved poll won't work.
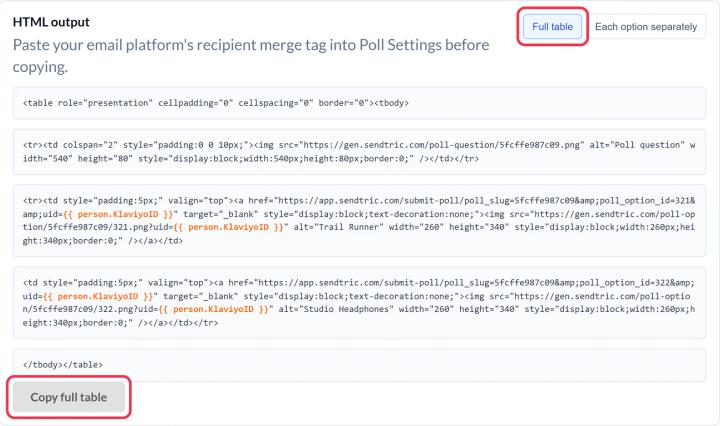
- Below the canvas, in HTML output, choose Full table and click Copy full table. Choose Each option separately instead if your email layout places the options in different spots.
- In your email platform, add a custom HTML (code) block and paste the code.
- Send yourself a test and click an option to check your vote is recorded.
If you've connected Klaviyo, Mailchimp or HubSpot, you can use the Push to button at the top of the editor instead of copying the code. See how to push a widget to Klaviyo, Mailchimp or HubSpot.
Once your email has been sent, don't change the preset or delete options. Votes on removed options aren't accepted, so those links in the sent email stop working. Smaller changes like colors and text are fine, and show up in sent emails the next time they're opened.
Polls made before the new editor
Polls created in our previous editor open read-only, with the message "This poll is no longer editable". They keep working in emails you've already sent. To make changes, click Create new poll and rebuild it in the new editor.
To learn more about email polls, see our Email Poll Widget page.
Related
- How to design your poll: options, layers and live results
- How to set up the UID merge tag and track unique responses
- How to choose what voters see after they vote
- How to see poll results and download reports
- Looking for ideas? See how to use interactive email polls.
Was this article helpful?
Thanks for your feedback!