
How to create and manage subaccounts
Last updated
Subaccounts let an Enterprise account keep separate workspaces for different brands, regions, teams or clients. Each subaccount has its own widgets and users, while billing and views stay on the main account.
Create a subaccount
- In the dashboard, click Accounts in the top menu.
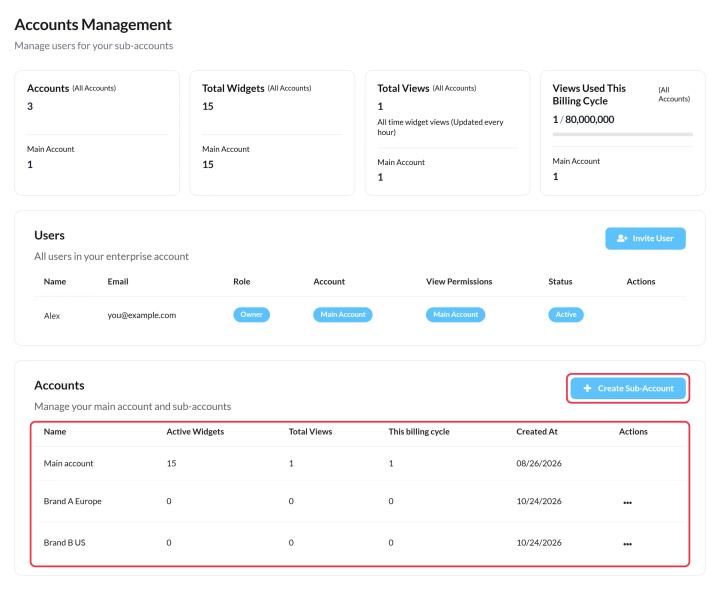
- In the accounts table, click Create Sub-Account.
- Enter a name (at least 2 characters) and save.
Then invite people to it. See how to invite users and set their roles.
Working across accounts
- Accounts Management shows each account's active widgets, total views and views this billing cycle.
- Main-account users can filter widget lists by account, and create widgets for a subaccount with Select account in the editor.
- Subaccount users can start timers from templates made on the main account, shown on their Corporate tab. See how to save and reuse timer designs with templates.
- Upload brand fonts once on the main account and they're available in every subaccount. See how to upload custom brand fonts.
- Each subaccount can have its own widget domain. See how to use your own domain for widgets.
Rename or archive
In the accounts table, click Rename or Archive. Archiving can't be undone: the subaccount's widgets move to the main account.
Limits
Each Enterprise tier includes a set number of subaccounts. Need more? Account owners can click Add Sub-Account in Settings > Plan & Billing to request one. Each extra subaccount also adds 5 users.
Related
Was this article helpful?
Thanks for your feedback!