
How to create a count-up timer
Last updated
A count-up timer shows how much time has passed since a moment, instead of how much is left. Use it for "Live for 3 days", "Member for 2 years", or "Day 12 of our fundraiser". Count Up is available on Standard and above, with every timer type.
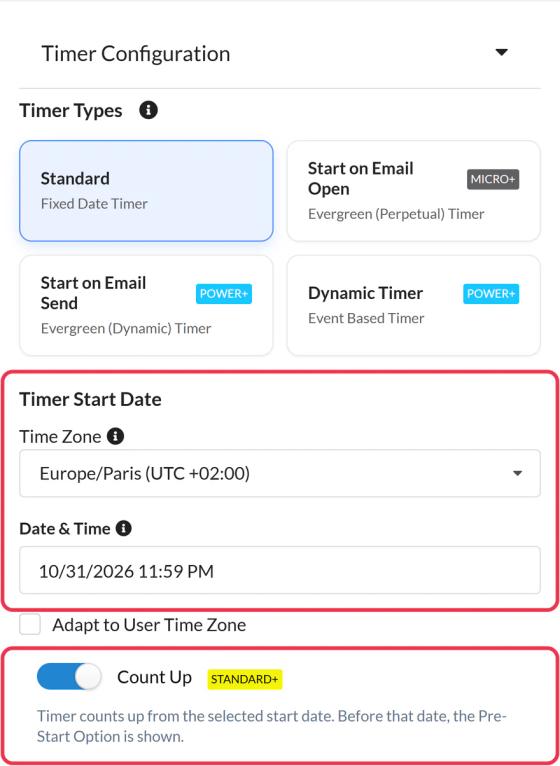
Turn on Count Up
- Open your timer and expand Timer Configuration.
- Turn on Count Up.
- Set the start, depending on the timer type:
- Standard: choose the start date and time under Timer Start Date.
- Start on Email Open: counts up from 0 when the subscriber opens the email. Unique User Timer is turned on for you so each subscriber keeps their own count.
- Start on Email Send: counts up from when the email was sent.
- Dynamic Timer: counts up from the date in the code, for example each subscriber's signup date.
- Click Save.
Before the start date
For Standard and Dynamic timers, Pre-Start Option in Visual Design decides what shows before the start date: zeros, your own image, your own text, or nothing. See how to choose what shows when a timer ends.
Good to know
- Pick which units to show in Text and Labels > Display. For long periods, show years and days and hide seconds.
- Dynamic Links aren't available on count-up timers.
To learn more about email countdown timers, see our Email Countdown Timer page.
Related
- Which countdown timer type should I use?
- How to set up a Dynamic or Start on Email Send timer
- Countdown timer customization options
Was this article helpful?
Thanks for your feedback!