
How to create a weather widget
Last updated
The weather widget shows a live forecast in your email, created when the email is opened. Show the weather for one place (like your event venue) or each subscriber's own location.
Step 1: Create the widget
- In the dashboard, open Tools and choose Weather widget.
- Click Create New.
- Choose a Widget type:
- Primary Widget: a card with an optional header showing the city and "Weather forecast".
- Inline Widget: a compact strip with one cell per day.
Step 2: Settings
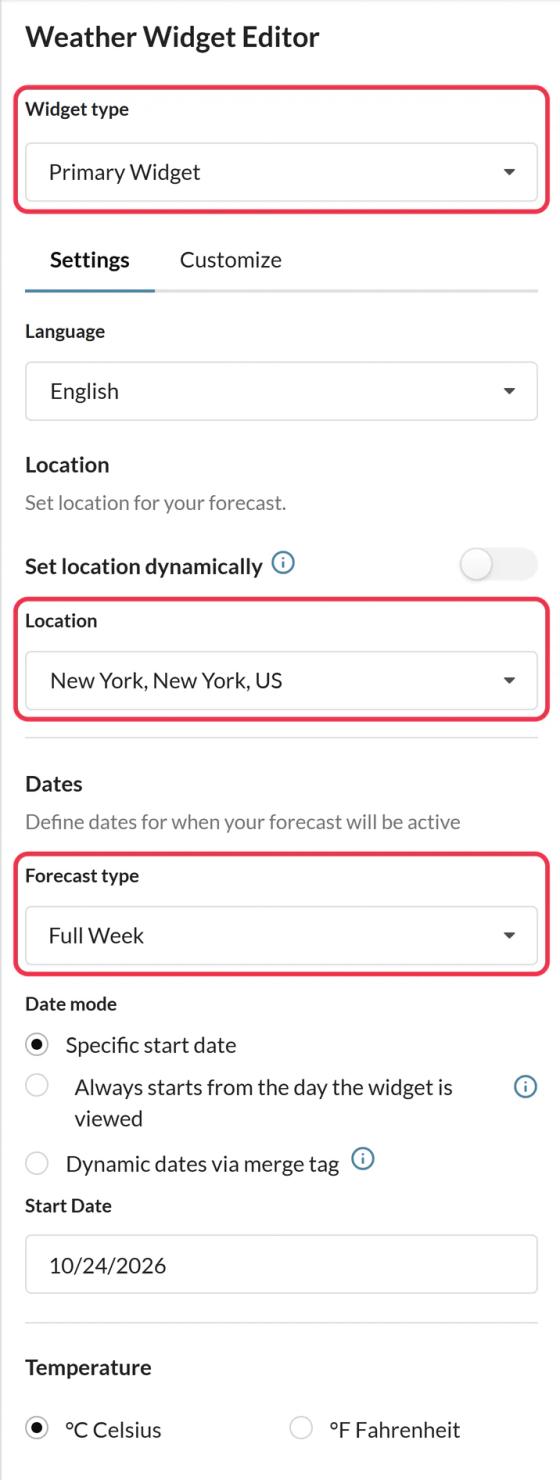
On the Settings tab:
- Language for day names and the header. See how to change the language of your widgets.
- Location: search for a place, or turn on Set location dynamically to show each subscriber their own forecast. See how to show each subscriber their local weather.
- Dates: how many days (Full Week, 5 Day, 3 Day or 1 Day) and when the forecast starts. See how to set the forecast dates for a weather widget.
- Temperature: °C Celsius or °F Fahrenheit.
Step 3: Design
On the Customize tab:
- Show Accent Header and a Header Background preset, or your own image on Enterprise.
- Size, from X-Small to X-Large.
- Font and colors for week days, maximum and minimum temperatures, and the background.
Step 4: Save and add it to your email
Click Save, choose an alignment, click Copy Code and paste it into an HTML block in your email.
Good to know
- The forecast is created when the email is opened and can be up to an hour old.
- Forecasts cover up to 10 days ahead. Days without data show a dash.
- Without dynamic location or dates, don't add extra parameters to the code, or the image won't load.
Ideas
- The forecast for your event day, to help people plan.
- The weather at a traveler's destination in a pre-trip email.
- Rain gear when it's wet where the subscriber lives. Pair weather with other widgets in how to put one widget inside another.
To learn more about weather widgets, see our Weather Widget for Email page.
Related
- How to show each subscriber their local weather
- How to set the forecast dates for a weather widget
- How to add a widget to your email
Was this article helpful?
Thanks for your feedback!