
How to Add Rule-Based Images to HubSpot
Pick the right image for each HubSpot contact at the moment they open the email, using contact properties, dates, times or devices.
 First Publish Date:
Match the image to the contact, by industry, stage or time of day.
A Sendtric rule-based image is a set of images plus rules. When a HubSpot contact opens your email, Sendtric runs through the rules from the top and shows the first image that fits that contact and that moment.
HubSpot's own smart content can swap modules in marketing emails, but it needs Marketing Hub Professional or Enterprise, and in emails its rules can only use segment membership and lifecycle stage. Rule-based images work on any HubSpot plan that lets you add the HTML, can read any contact property you pass in, and can also use the open date, time, day or device.
What you can do with rule-based images in HubSpot
- Industry-specific hero images: one newsletter, with a retail, healthcare or finance hero picked from the
industryproperty. - Lifecycle messaging: a "Start your trial" banner for leads and a "See what's new" banner for customers, from the lifecycle stage.
- Office hours: a "Chat with us now" image during your support hours and a "Book a call" image outside them, using Time and Day Of Week rules.
- Regional offers: a different promo image by
{{ contact.country }}or{{ contact.state }}.
| What a rule can check | Plan |
|---|---|
| A contact property's text, the email client, the operating system | All plans |
| Date, time, day of the week, a date property | Standard and above |
| A contact property as a number, the device type | Power and above |
How to add rule-based images to HubSpot
Step 1: Add your images
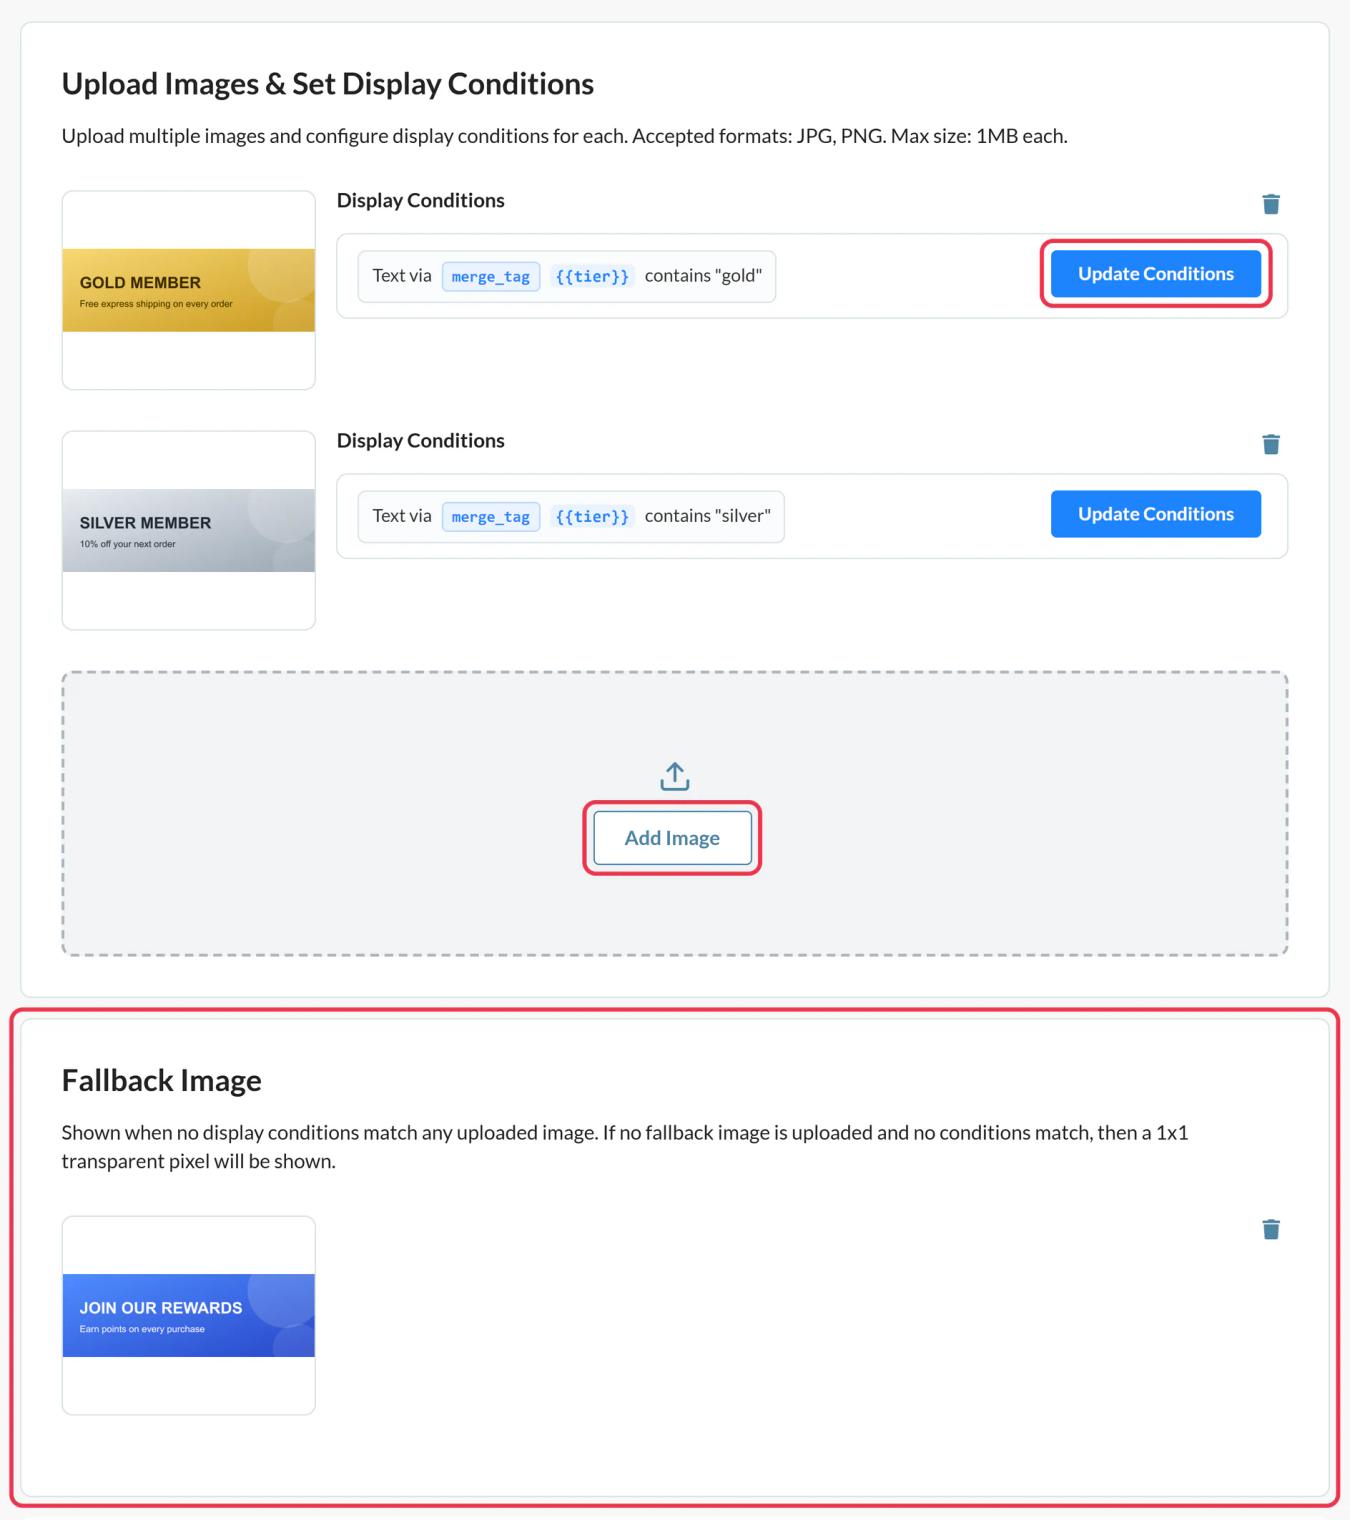
In Sendtric, open Rule-based Images, click Create New and use Add Image for each version. Add them in priority order: the first match wins and you can't drag them into a new order later.
Step 2: Set conditions for each image
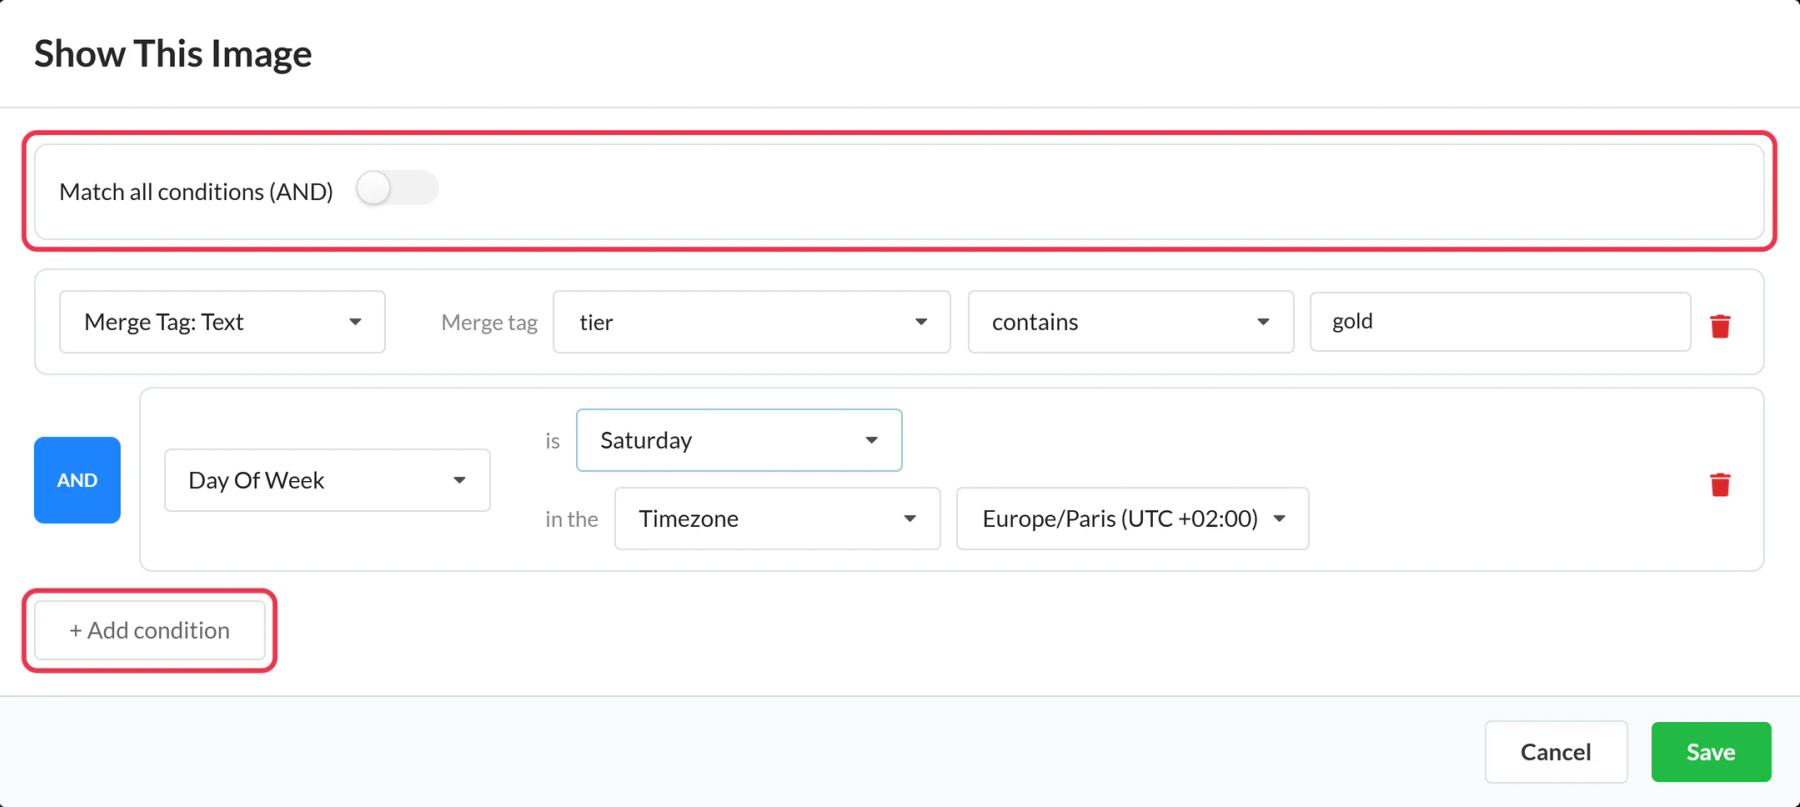
On each image card click Update Conditions, choose AND or OR, then + Add condition. For a HubSpot property choose Merge Tag: Text, give it a name such as stage, and set the value to match, for example equals customer. Leave no image without a condition, or it will never show.
Step 3: Add a fallback, simulate and save
Upload a Fallback Image for anyone who matches nothing, run a few Preview simulations with different values, then click Save.
Step 4: Swap in the HubSpot tokens
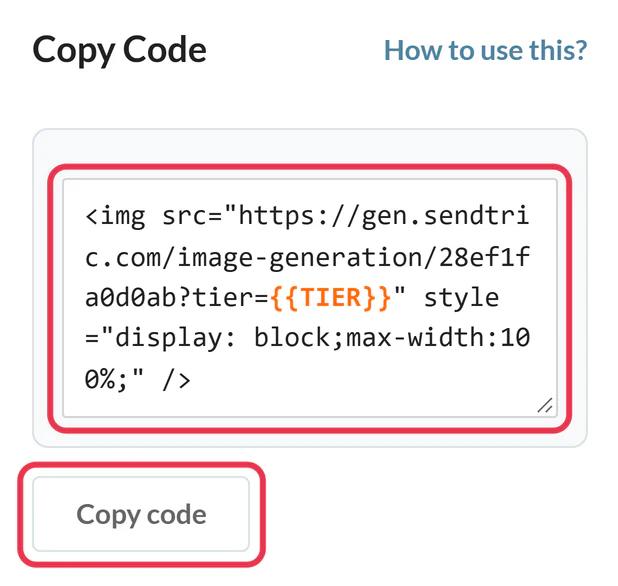
Click Copy code. Each merge-tag condition appears as a parameter like stage={{stage}}. Replace the placeholder with the HubSpot token, for example stage={{ contact.lifecyclestage }}. Use internal property names, the same ones Browse HubSpot tags shows when your account is connected.
Step 5: Add it to the email
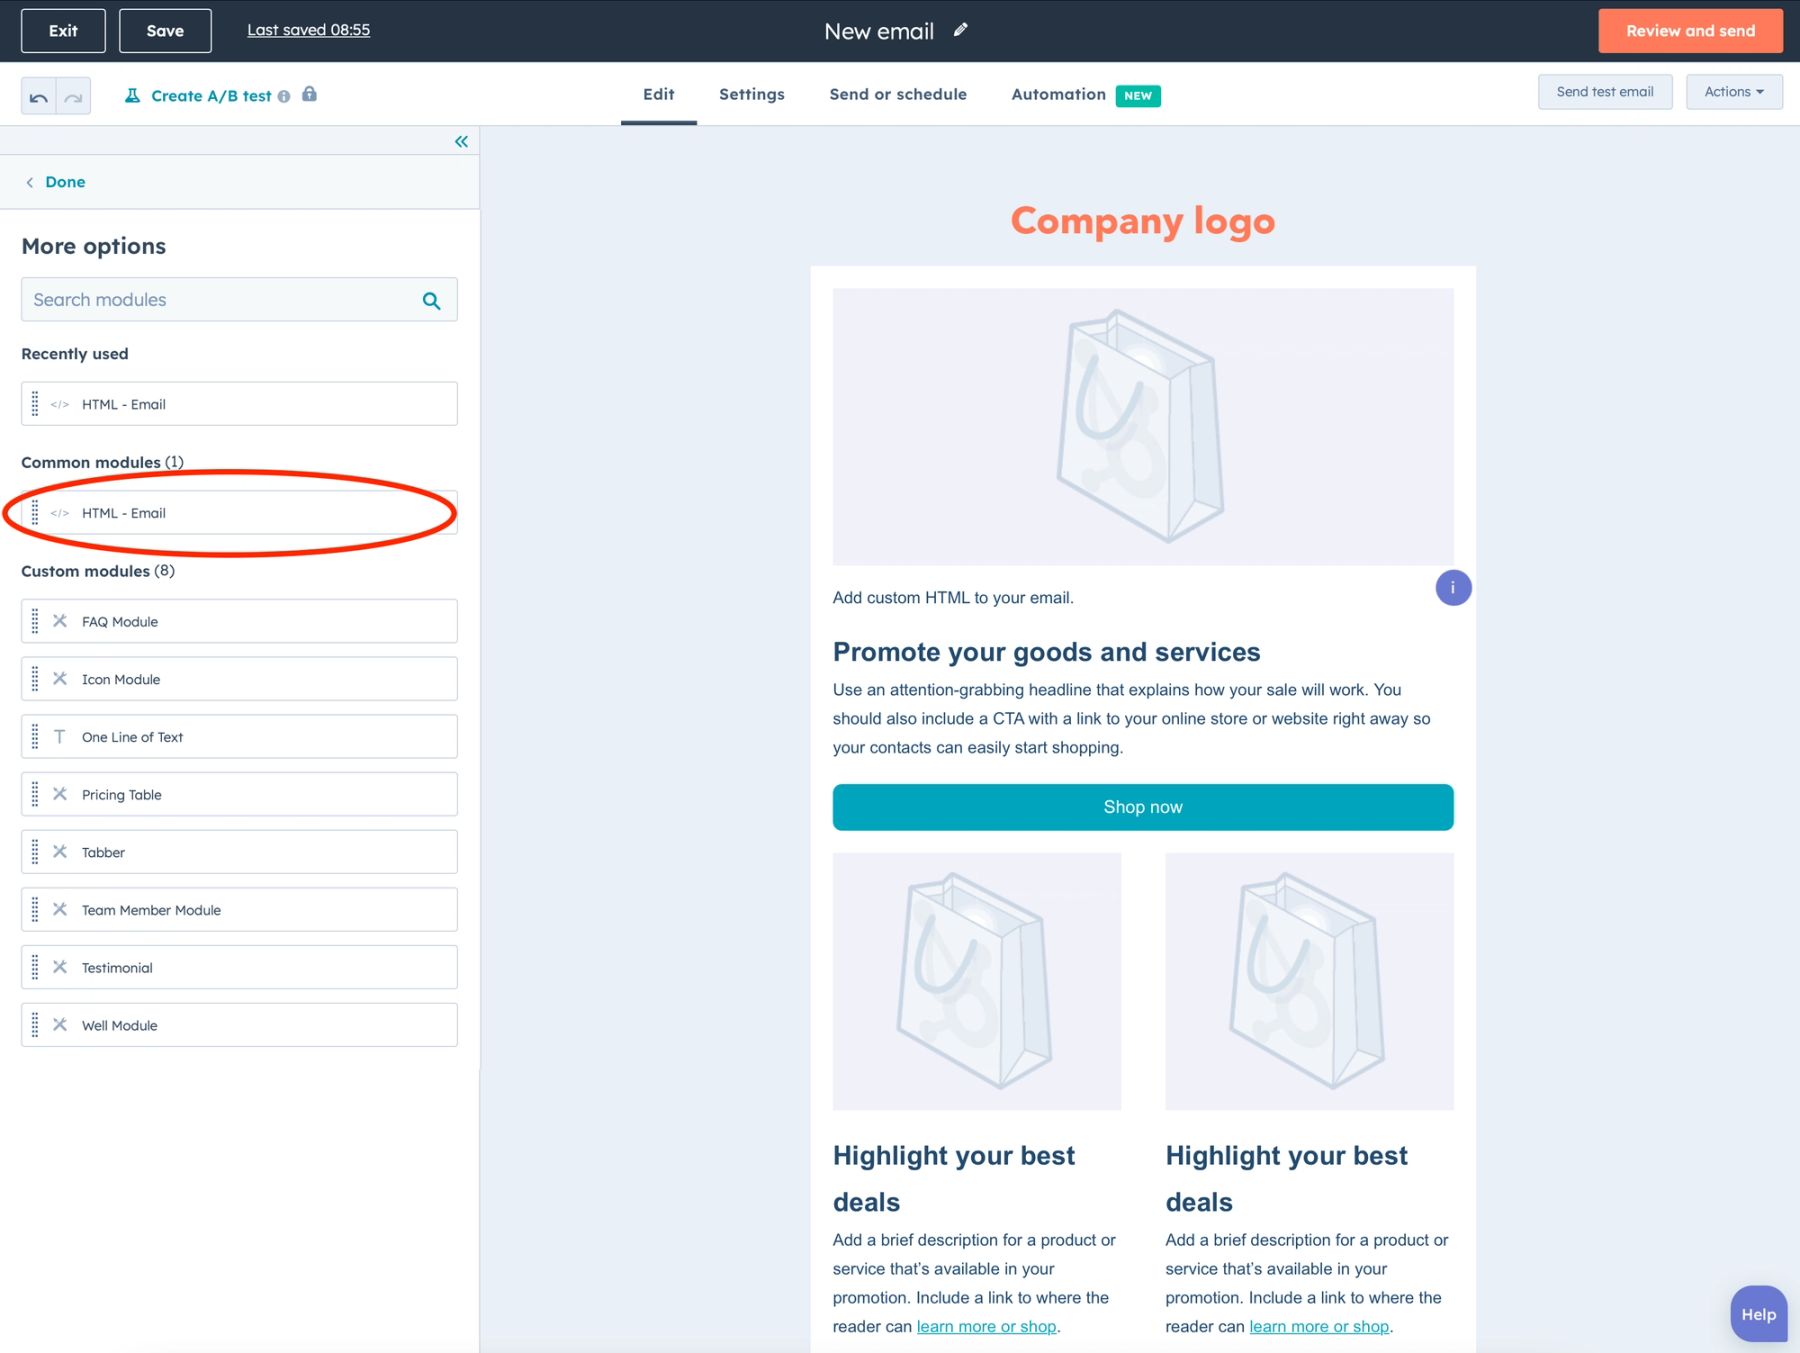
In the HubSpot email editor, click More in the Content tab, drag the HTML - Email module into place and paste the code into the HTML box. If your account is connected and on a paid HubSpot plan, Push to HubSpot adds the image as a reusable email module instead.
Step 6: Send tests to two contacts
Use Preview and test, then Send test email, previewing as a contact from each group. Check that each test shows the image meant for that group.
Dropdown properties have two names for each value
Properties like lifecycle stage store an internal value next to the label you see in HubSpot (for example marketingqualifiedlead for "Marketing Qualified Lead"). Check your property settings and a test send to see which one the token puts in the image code, and write your rules to match. A contains rule on a short word like customer is a safe way to cover both.
Plan check for the HTML module
The HTML - Email module isn't listed in every HubSpot account. Custom email modules are a Marketing Hub Professional and Enterprise feature in HubSpot, so if it's missing from More, your subscription is the first thing to check.
More examples of conditions: how to set display conditions for rule-based images.
HubSpot Rule-Based Images FAQ
Can I use HubSpot list membership in a rule?
Not directly. Rules read the values in the image code, so record what you need in a contact property (for example by setting it with a workflow) and write the rule against that property.
Are text rules case sensitive?
No. "Customer" and "customer" both match. Spelling still has to match exactly unless you use contains.
When is the image chosen?
At every open. Contact property values are set when HubSpot sends the email, while date, time and device rules are checked again each time the email is opened.
Are device rules reliable?
Mostly. Gmail loads images through its own proxy, so those opens may be read as desktop. Use a contact property when the split really matters.
What if no rule matches?
The fallback image shows. With no fallback, Sendtric returns an invisible 1x1 image.
Read more about rule-based images and how it all fits into a wider email personalization strategy.
More HubSpot guides
- Countdown Timers - How to Add Countdown Timers to HubSpot
- Live Polls - How to Add Live Polls to HubSpot
- Personalized Images - How to Add Personalized Images to HubSpot
- Dynamic Weather - How to Add Dynamic Weather to HubSpot
- Critical Alerts - How to Add Critical Alerts to HubSpot
- Social Proof Counters - How to Add Social Proof Counters to HubSpot
Using a different platform? See all Sendtric integrations.