
How to Add Personalized Images to Brevo
Turn Brevo contact attributes into text on an image: a first name on a banner, a booking reference on a ticket, a points balance on a loyalty card.
 First Publish Date:
Put each contact's own details on the picture, not just in the text.
Brevo already fills {{ contact.FIRSTNAME }} into your text. With Sendtric personalized images the same attributes are drawn onto an image when the email is opened, so a banner can say "Your summer picks, Maria" in your brand font, right across the photo.
Brevo's Image block can load an image from a URL, but it doesn't draw text onto images itself. Brevo's own help center points to a third-party tool for this, added through the HTML block, which is exactly how Sendtric works too.
What you can do with personalized images in Brevo
- Named hero banners: the contact's first name on the main image of a newsletter or a welcome email.
- Booking and order details: a travel or event business can show the destination, date or seat stored in Brevo attributes on a ticket-style image.
- Loyalty cards: the contact's tier and points balance on a card design, filled from custom attributes you sync from your shop or CRM.
- Discount codes: a unique code from an attribute printed on a coupon image instead of plain text.
How many personalized text layers you can use depends on your Sendtric plan: 1 on Free, 2 on Micro, 4 on Standard and 20 on Power and Enterprise. Extra image layers start on Standard. See pricing.
How to add personalized images to Brevo
Step 1: Design the image
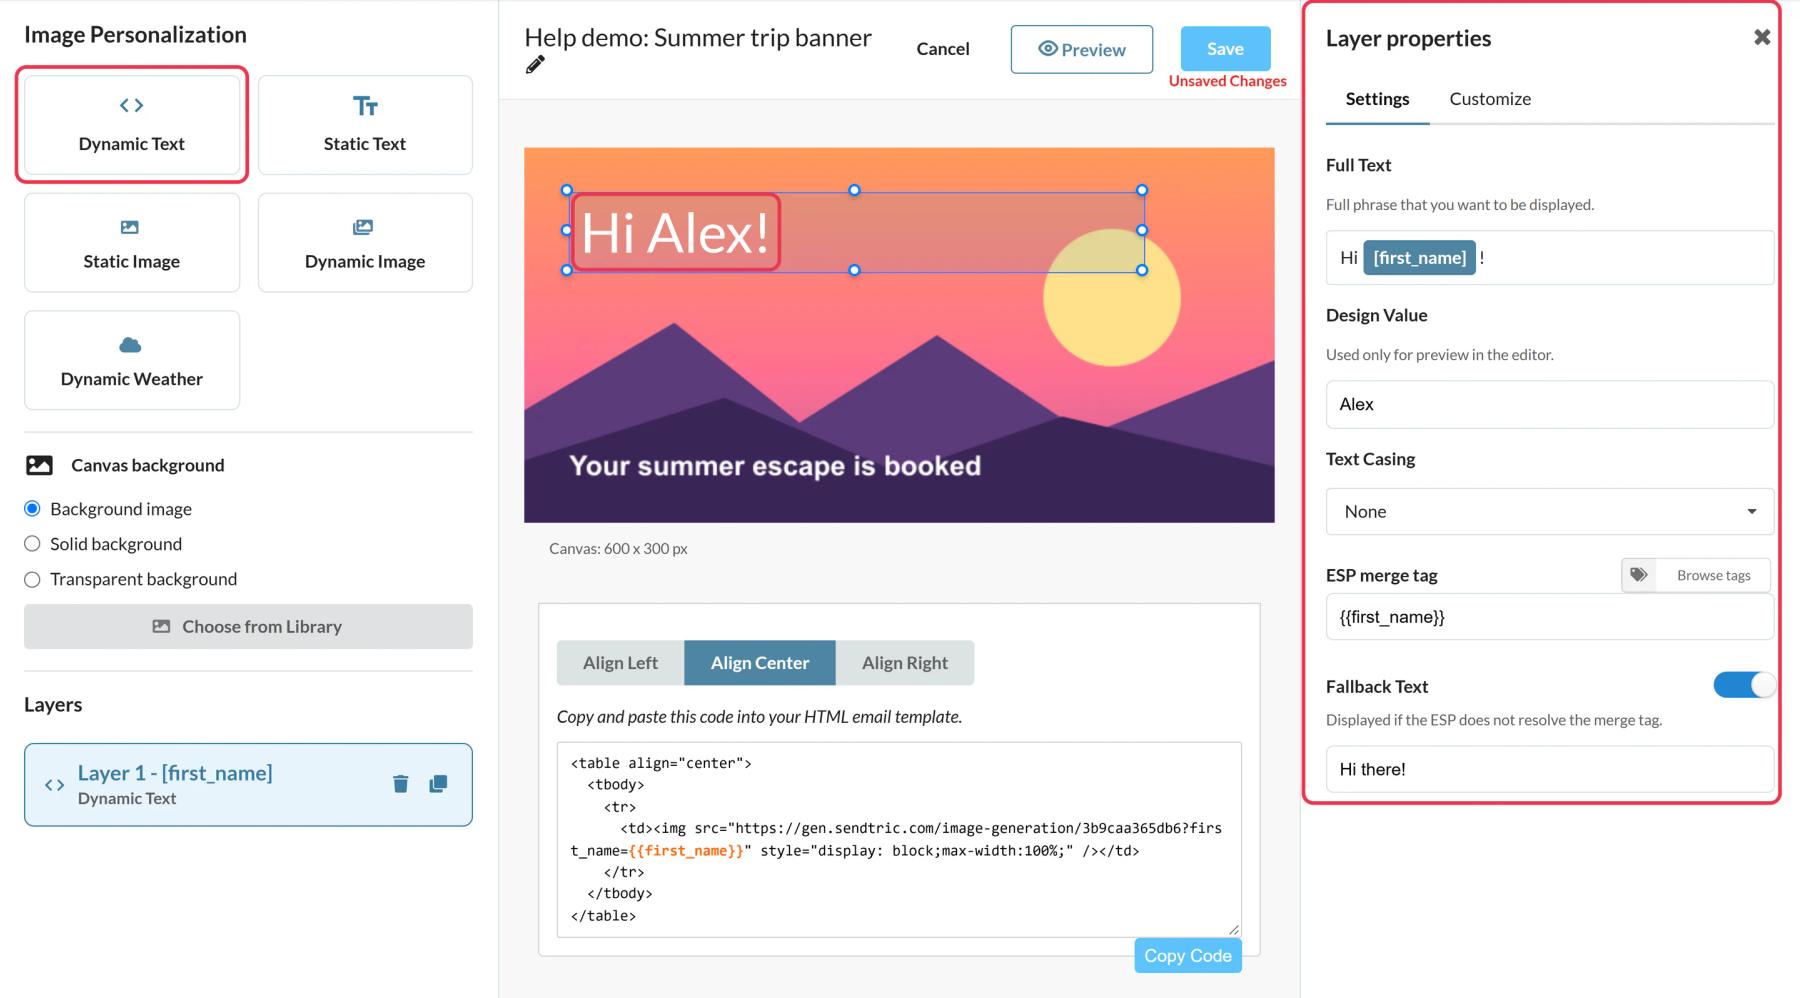
In Sendtric, open Image Personalization and click Create New. Pick a background from your library, or start from a solid or transparent canvas, then add a Dynamic Text layer where the personal detail should appear.
Step 2: Map each variable to a Brevo attribute
In the Add Dynamic Text window, give the variable a name, then enter the Brevo placeholder in ESP Merge Tag. Brevo placeholders follow the pattern {{ contact.ATTRIBUTE }}, using the attribute name exactly as it appears on your Brevo contacts list, for example {{ contact.FIRSTNAME }} or a custom {{ contact.LOYALTY_POINTS }}.
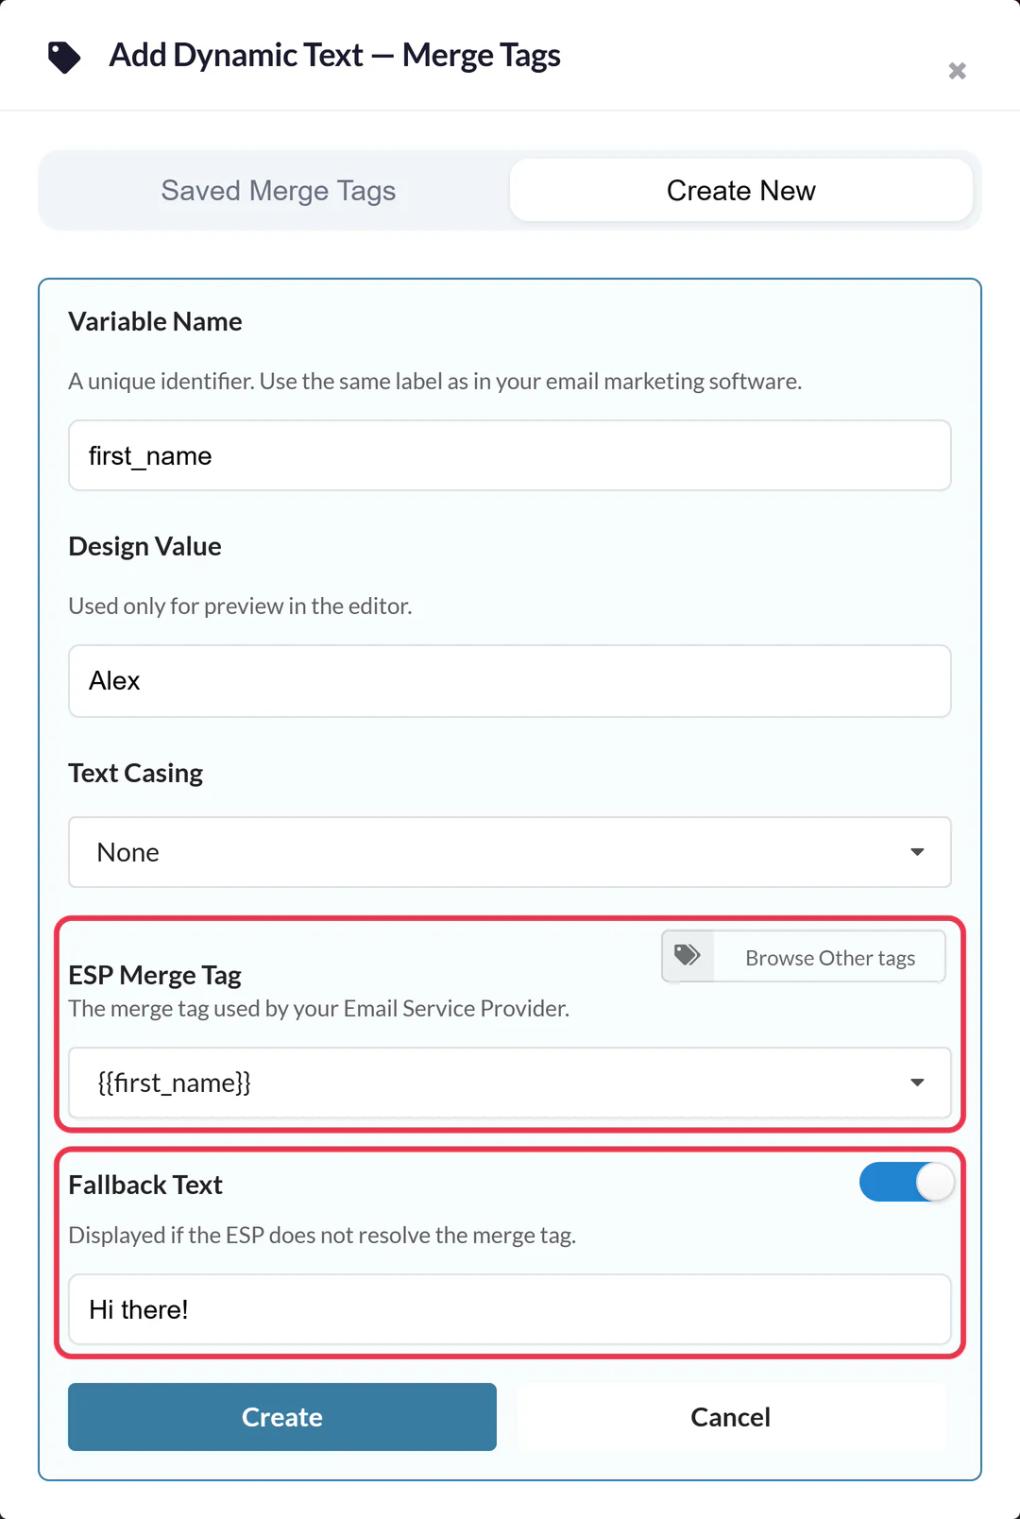
Fill in Fallback Text too. If a contact's attribute is empty, the layer shows the fallback instead, so write it as a full phrase such as "Your summer picks" rather than a single word.
Step 3: Save and copy the code
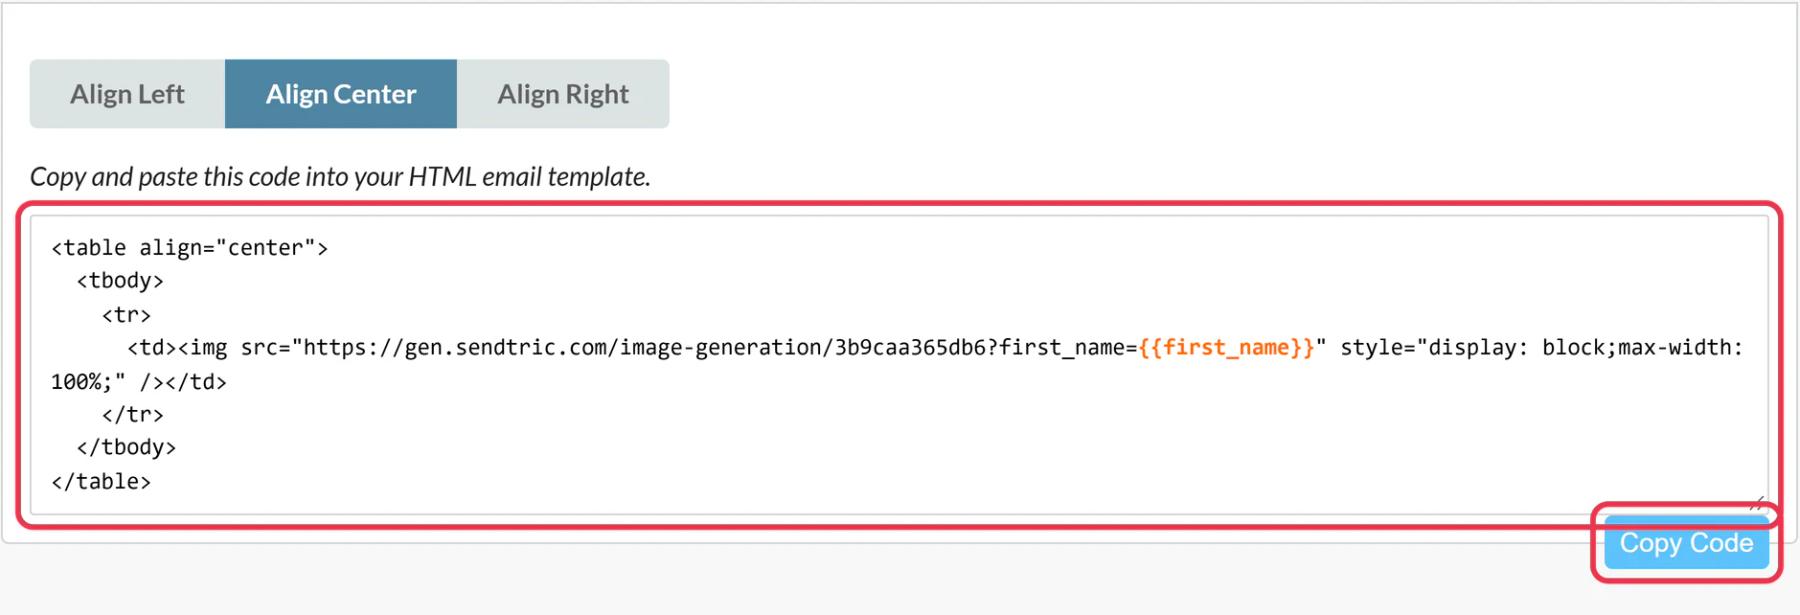
Click Save. The embed code appears under the canvas, with your Brevo placeholders already in the image address. Choose an alignment and click Copy Code.
Step 4: Add an HTML block in Brevo
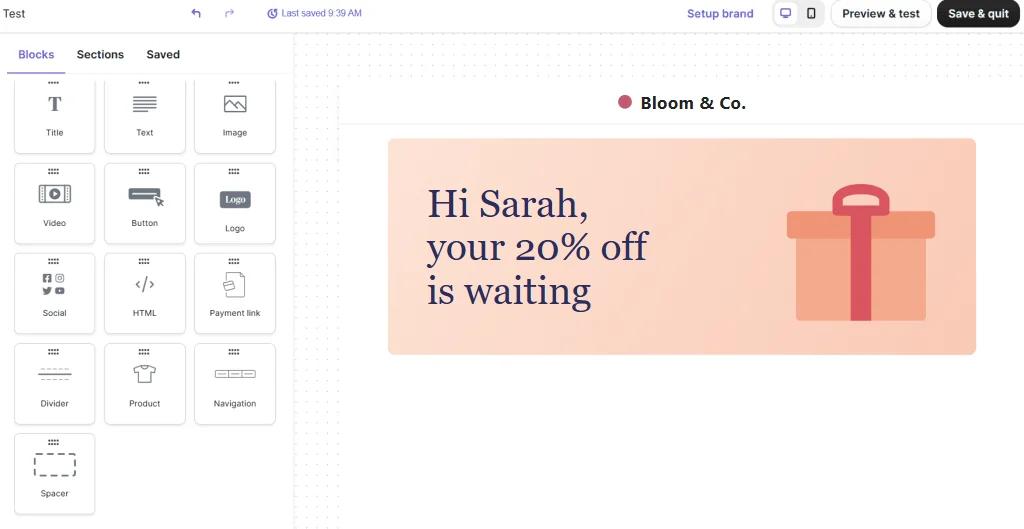
In the Brevo drag and drop editor, go to Content > Blocks and drag the HTML block into your design. Click it, replace the placeholder text with the Sendtric code and save. Don't worry if the image in the editor shows the placeholder rather than a name: Brevo only fills in contact details when it sends.
Step 5: Check it with real contact data
Open Preview & test. Previewing as a specific contact shows whether the attributes are filled in, and a test send to your test list shows the finished image in a real inbox. Try a contact with a long name and one with the attribute left empty.
Keep image URLs visible in the campaign settings
Brevo's help center asks you to check that Hide Images URL is set to No in your campaign settings when you use personalized images from a third-party tool. Also leave Embed images in the email unticked under Additional settings, since that sends images as attachments instead of loading them when the email is opened.
Let Sendtric handle empty attributes
Brevo has a default filter for empty attributes, but inside the image address it's simpler to leave the placeholder plain and rely on Sendtric's Fallback Text. That way you set the fallback once, in the image design, and it's styled like the rest of the text.
Brevo Personalized Image FAQ
Which Brevo attributes can I use?
Any contact attribute you store in Brevo, default or custom, written as {{ contact.ATTRIBUTE }} with the exact attribute name. First name, last name, country and your own custom fields all work.
Why doesn't the Brevo editor show my name on the image?
Brevo fills in placeholders when it sends, so in the editor the image can't show real contact data yet. Use Preview & test or a test send to see the finished image.
What if a long name doesn't fit?
Text wraps inside its box but doesn't shrink, so a long value can run below the box. Make the box tall enough and test with the longest name or city you expect.
Can I change the image after the campaign is sent?
Yes. Edit and save the image in Sendtric and every email that contains it shows the new version on the next open. You don't need to copy the code again.
Do personalized images work in Brevo automations?
Yes. Save the design as an email template and use it in your automation's Send an email step. The attributes are filled in for each contact when that email goes out.
Ready for more? The personalized images overview covers every setting, and the email personalization page shows how to combine it with other Sendtric widgets.
More Brevo guides
- Countdown Timers - How to Add Countdown Timers to Brevo
- Live Polls - How to Add Live Polls to Brevo
- Rule-Based Images - How to Add Rule-Based Images to Brevo
- Dynamic Weather - How to Add Dynamic Weather to Brevo
- Critical Alerts - How to Add Critical Alerts to Brevo
- Social Proof Counters - How to Add Social Proof Counters to Brevo
Using a different platform? See all Sendtric integrations.