
How to Add Personalized Images to SendGrid
Turn SendGrid contact fields or Dynamic Template data into text drawn on an image, so every recipient sees their own name, city or booking details.
 First Publish Date:
Print each recipient's name, city or booking details onto an image in SendGrid.
With personalized images, Sendtric draws text over a background picture at the moment the email is opened. The text comes from your SendGrid data: a contact field in a Single Send, or a value you pass with each API request in a Dynamic Template.
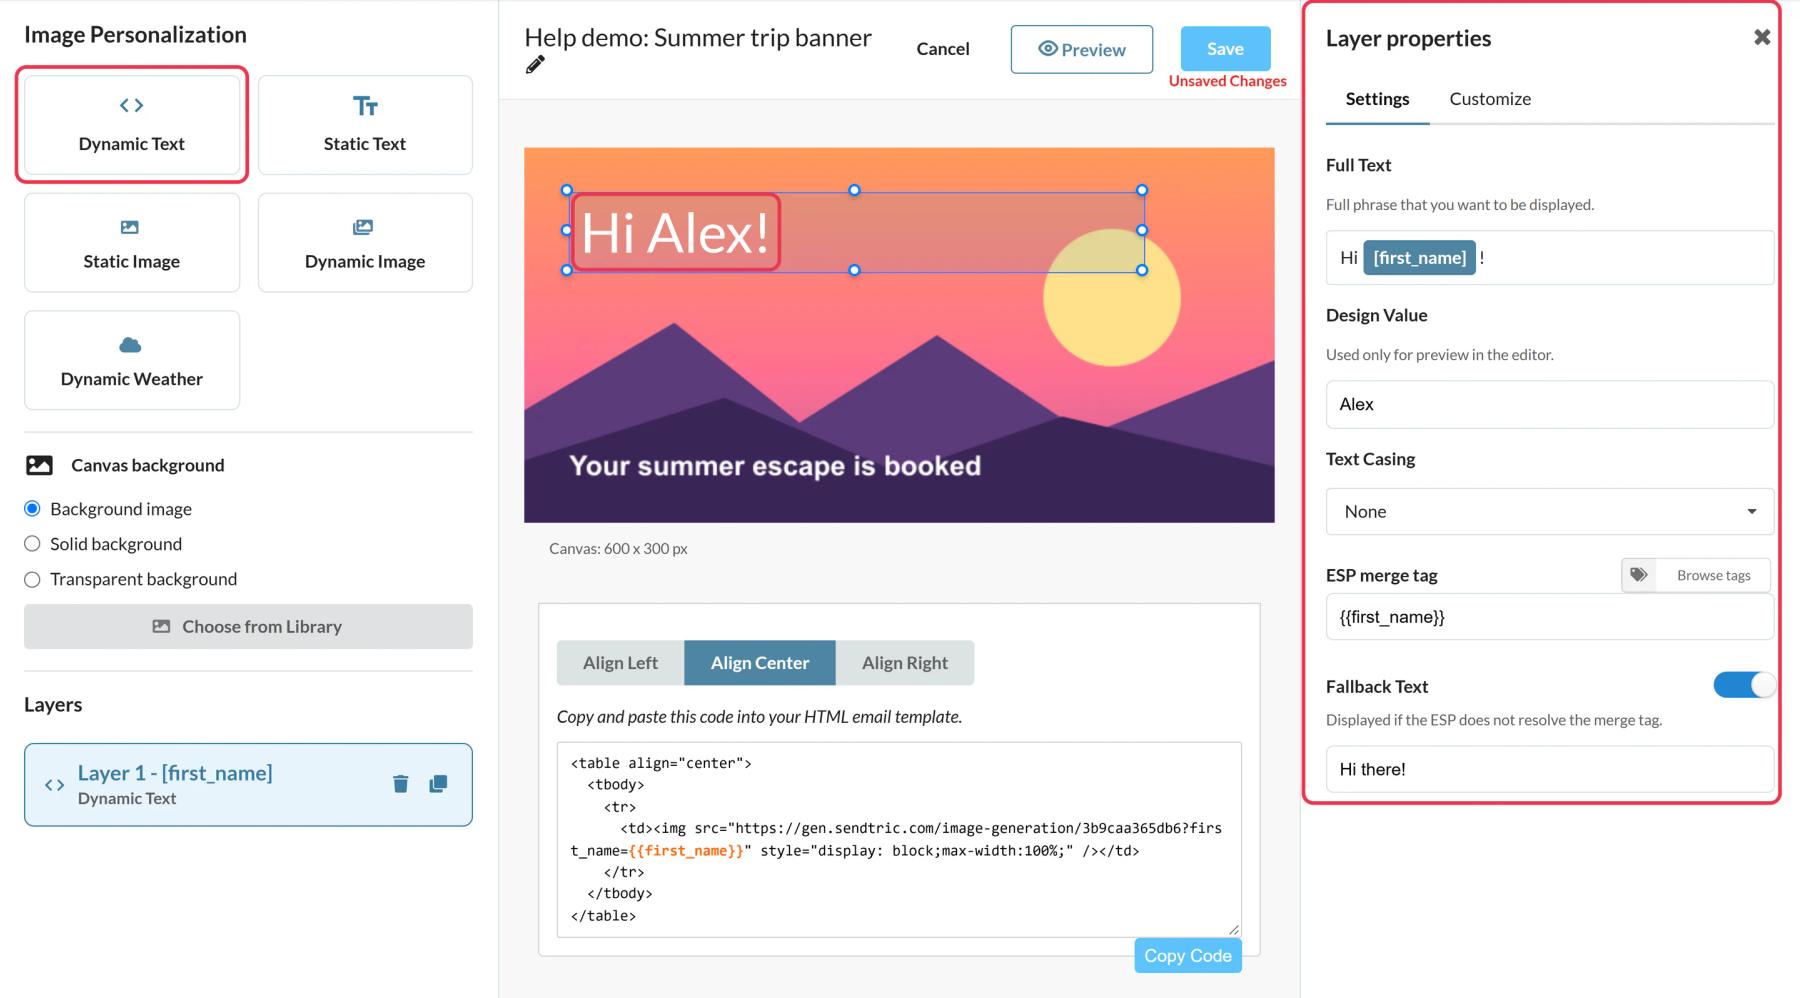
SendGrid can already put {{first_name}} in a line of text. What it can't do is set that name in your brand font on top of a photo. That is the gap a personalized image fills.
What you can do with personalized images in SendGrid
- Booking and travel confirmations: show the destination, dates and passenger name on a hero image in a Dynamic Template, using fields your booking system already sends.
- Welcome emails: greet new contacts by first name on a branded banner in an Automation.
- Account summaries: put a customer's points balance or plan name on a card image in a monthly Single Send.
- Local offers: write the contact's city from SendGrid's
cityfield into a store opening or event banner.
The Free plan includes one text layer. Micro allows two, Standard four and Power twenty, and Standard adds static image layers such as a logo or product shot.
How to add a personalized image to SendGrid
Step 1: Set up the canvas
In Sendtric, open Image Personalization and click Create New. Choose a background from your library, or a solid color on Standard and above.
Step 2: Add a Dynamic Text layer with the SendGrid tag
Add a Dynamic Text layer and create a merge tag. Give it a Variable Name such as first_name, then type the SendGrid tag into ESP Merge Tag. In a Single Send that is the field from the Tags tab, such as {{first_name}} or {{city}}. In a Dynamic Template it is the key you send in dynamic_template_data, such as {{passenger_name}}.
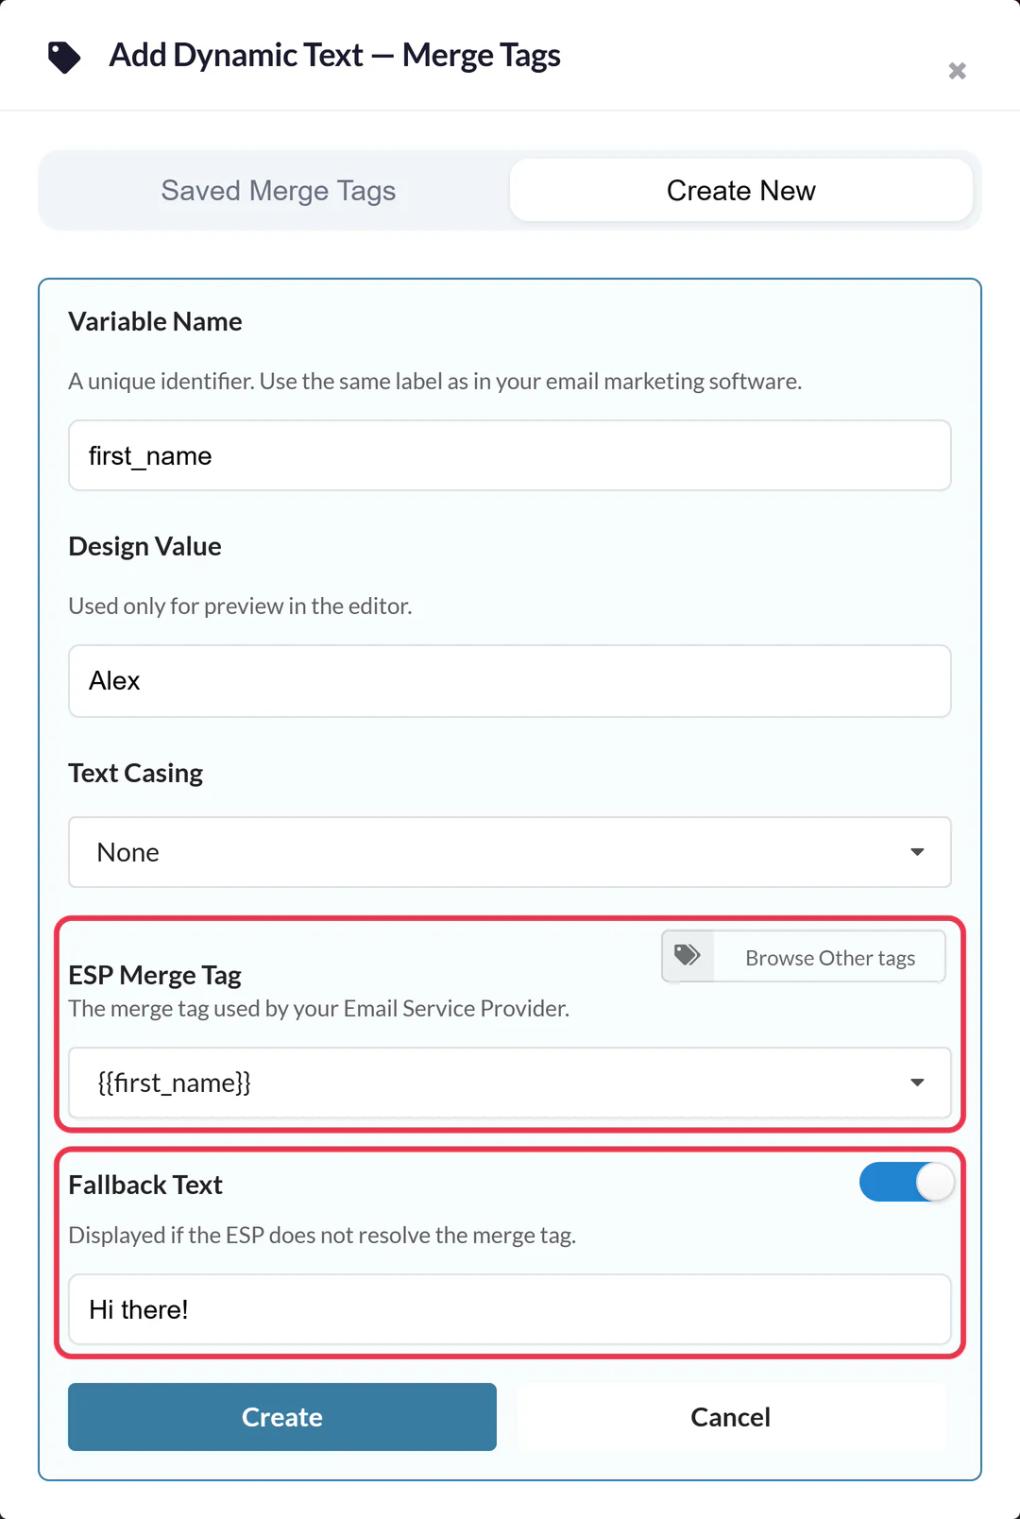
Fill in Fallback Text with a complete phrase, such as "Welcome aboard!", for contacts whose field is empty. Without it, the layer is hidden for them.
Step 3: Save and copy the code
Style the text, check it with Preview, then click Save. The embed code appears after the first save. Click Copy Code.
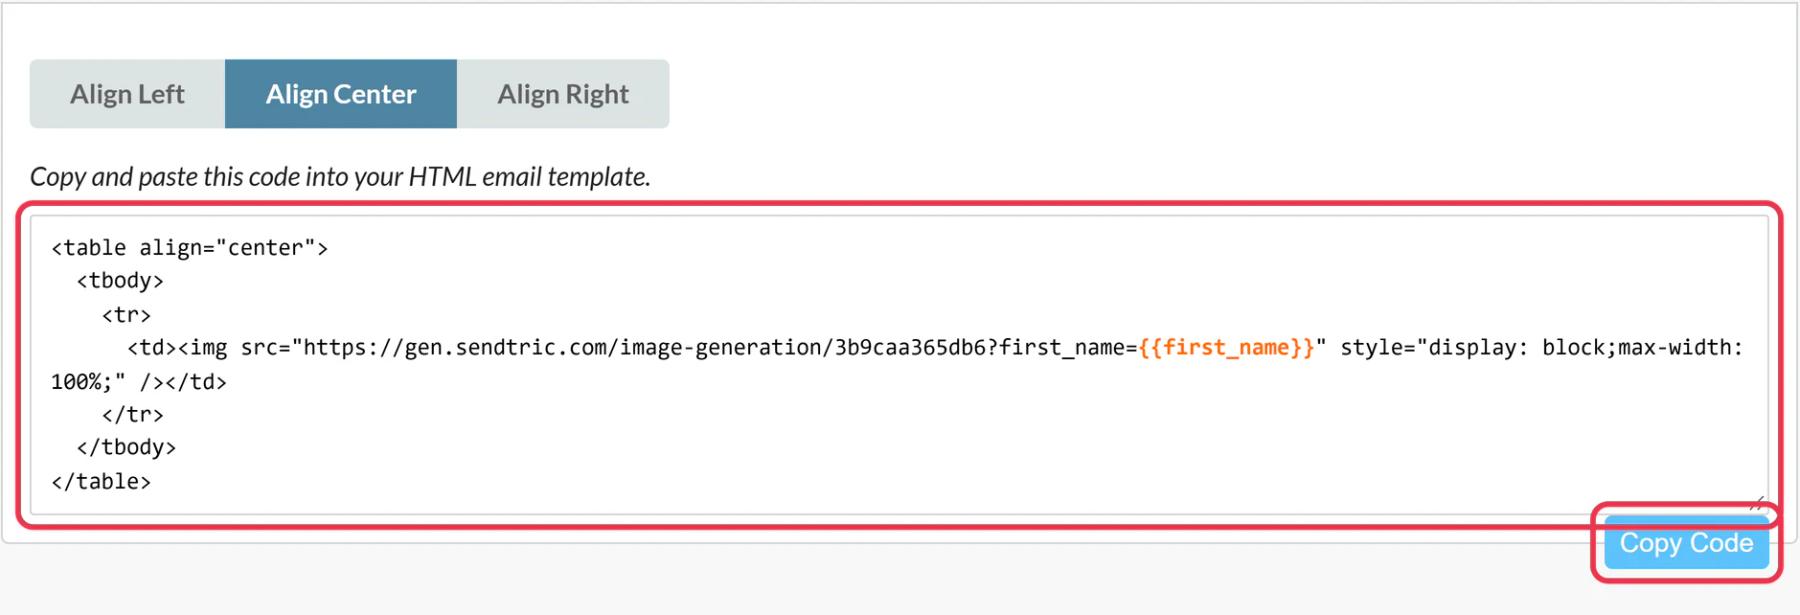
Step 4: Paste it into SendGrid
In the Design Editor, drag a Code module from the Build tab into your email, paste the code into Edit Module HTML and click Update.
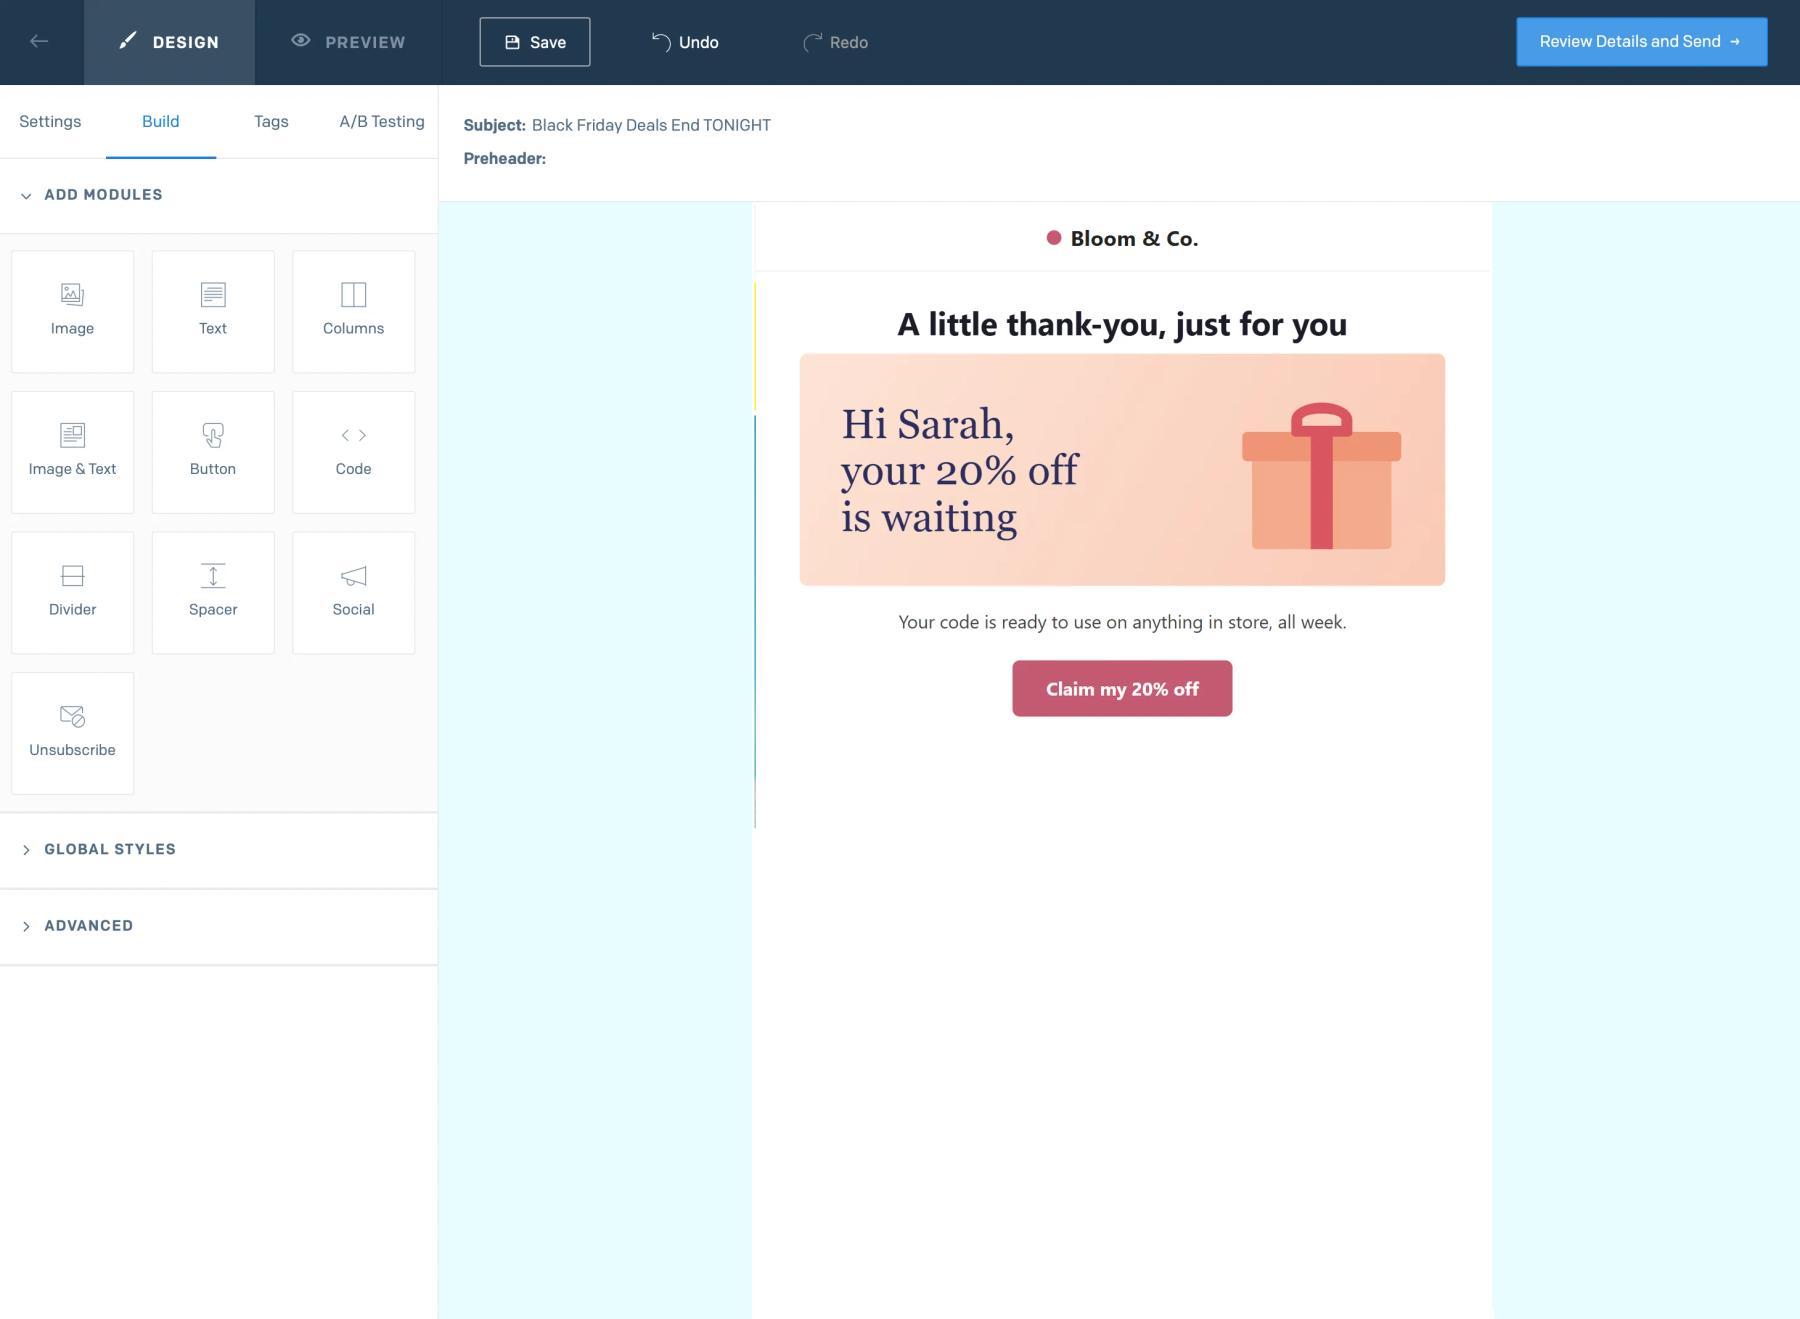
Step 5: Preview with test data, then send a test
Click Preview and Show Test Data, enter a sample contact and check the image. Then send a real test. If the image shows {{first_name}} as text, the field name in the URL doesn't match SendGrid's.
Use the plain tag, not the insert helper
The Tags tab copies a tag like {{ insert first_name 'default=default' }}. Inside the image code, use the short form {{first_name}} and let Sendtric's Fallback Text handle blanks. That keeps the image URL tidy and the fallback wording under your control in the design.
Allow room for long values
Text wraps inside its box but never shrinks. Preview with the longest name or city you expect, and make the box tall enough so nothing spills past the image.
SendGrid Personalized Images FAQ
Which SendGrid fields can I use?
Any contact field shown on the Tags tab, including reserved fields like first_name, last_name and city, and your own custom fields. In Dynamic Templates, any key you pass in the template data.
Does it work in transactional email?
Yes. Put the code in your Dynamic Template and make sure each request includes the keys used in the image URL.
What does someone with no first name see?
Your Fallback Text, if you set one. If you didn't, that text layer is hidden and the rest of the image still shows. See merge tags and fallback text in personalized images.
Can I change the design after the email is sent?
Yes. Save the changes in Sendtric and they apply on the next open, because the code points to your image rather than containing it.
Do previews count toward my views?
No. Only real opens of the image count. Rendered images are cached for about an hour for each combination of values.
This guide covers one piece of Sendtric's email personalization platform. For every personalized images option and example, see the main page.
More SendGrid guides
- Countdown Timers - How to Add Countdown Timers to SendGrid
- Live Polls - How to Add Live Polls to SendGrid
- Rule-Based Images - How to Add Rule-Based Images to SendGrid
- Dynamic Weather - How to Add Dynamic Weather to SendGrid
- Critical Alerts - How to Add Critical Alerts to SendGrid
- Social Proof Counters - How to Add Social Proof Counters to SendGrid
Using a different platform? See all Sendtric integrations.