
How to Add Countdown Timers in GetResponse
 First Publish Date: .Last Updated:
 GetResponse is a popular lifecycle automation platform used across a variety of industries and by businesses of varying sizes. They are highly praised for their automation workflows, email marketing, and landing pages.

To add a Sendtic countdown timer or email widget to your GetResponse campaigns, follow the steps below. It’s simple.
Step 1: Create Your Timer on Sendtric
You can create a free timer on our homepage or using your dashboard or use extra features through one of our paid plans. Our free plan is one of the most generous with 10,000 free monthly views with no watermark, but our paid plans allow you to use advanced customization and other features.
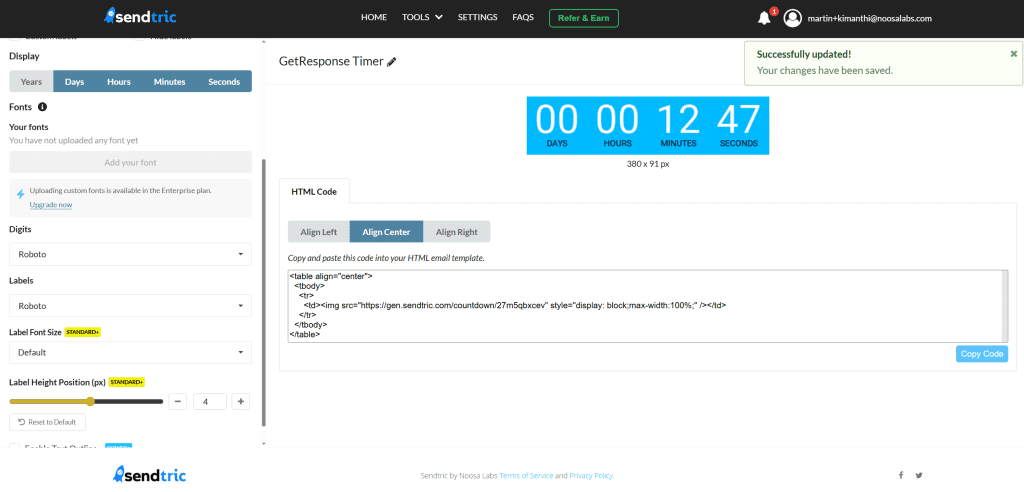
Once the widget is ready, you can copy its HTML embed code to your clipboard and head over to GetResponse.
Step 2: Insert Your Widget Into Your GetResponse Email
In your GetResponse account, go to the Email Editor and either open an existing newsletter to edit or create a new one. In the drag-and-drop editor, navigate to the Layout section and expand Basic Blocks.
Find the Custom HTML block in the list and drag it into your email where you want the Sendtric timer to appear.
Once the block is placed, click on it to open its properties panel on the right side of the editor. Paste the HTML code you copied from Sendtric into the code field. You will see a live preview of your timer update in the editor workspace.
The standard sendtric HTML code for a timer widget looks like this when it is centre aligned:
<table align="center"> <tbody> <tr> <td> <img src="https://gen.sendtric.com/countdown/xyz123456" style="display: block; max-width:100%;"/> </td> </tr> </tbody> </table>In the dashboard, you can select whether the time is aligned in the center, left, or right and the html code will adjust to your preference.
Step 3: You're Done
Once copied, the timer is ready to use on your GetResponse email campaigns. With its built-in preview feature and test tools, you can confirm that it works before rolling it out.
If you opt for the paid Sendtric plan and want to redesign the timer after placing it in a template, all you have to do is return to the Sendtric editor to make changes. There is no need to copy and paste the code again. Being an embedded URL, it will automatically reflect changes as you save them.
We’d love to hear about your experience using Sendtric with GetResponse. Feel free to reach out at support@sendtric.com with any questions, feedback, or ideas.