Note: Dynamic Timers are only available in the Power and Enterprise plans in the Pro Edition. Sign up for a plan today on our home page or upgrade your existing plan on the settings page.
This guide will cover integrating Sendtric Dynamic Timers in the Mailchimp platform. To see our full list of setup guides, click here.
1. Create your Dynamic Timer in Sendtric. See our tutorial about creating a Dynamic Timer.
2. Add your Dynamic Timer code to your Mailchimp template. See our tutorial about adding a timer to your Mailchimp template.
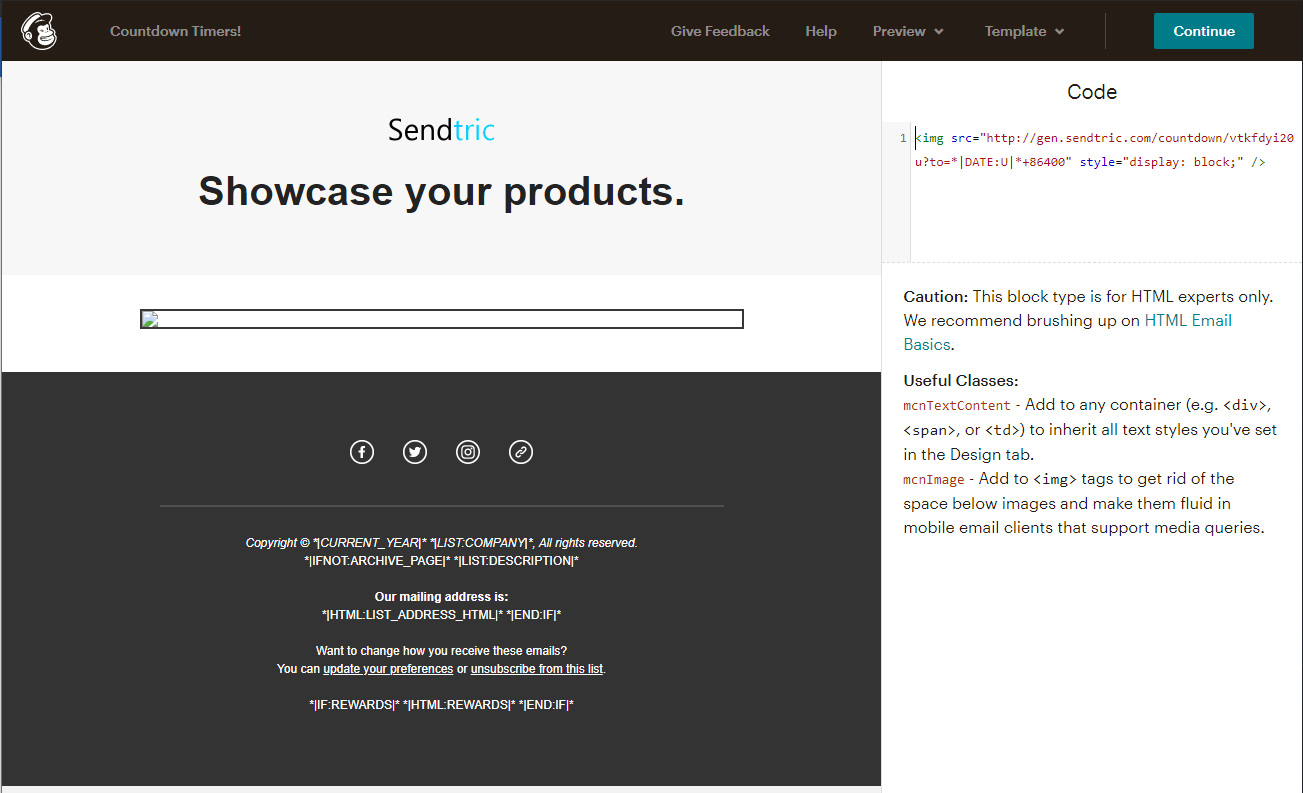
3. Modify the code by replacing {UNIX TIMESTAMP} with the Mailchimp date tag “*|DATE:U|*”, followed by the amount of additional time for your Dynamic Timer. This date tag represents the current time that the email is sent:
<img src=”http://gen.sendtric.com/countdown/vtkfdyi20u?to=*|DATE:U|*+86400” style=”display: block;” />
In this example, 86400 represents the number of additional seconds to count down, which is 24 hours in this case.
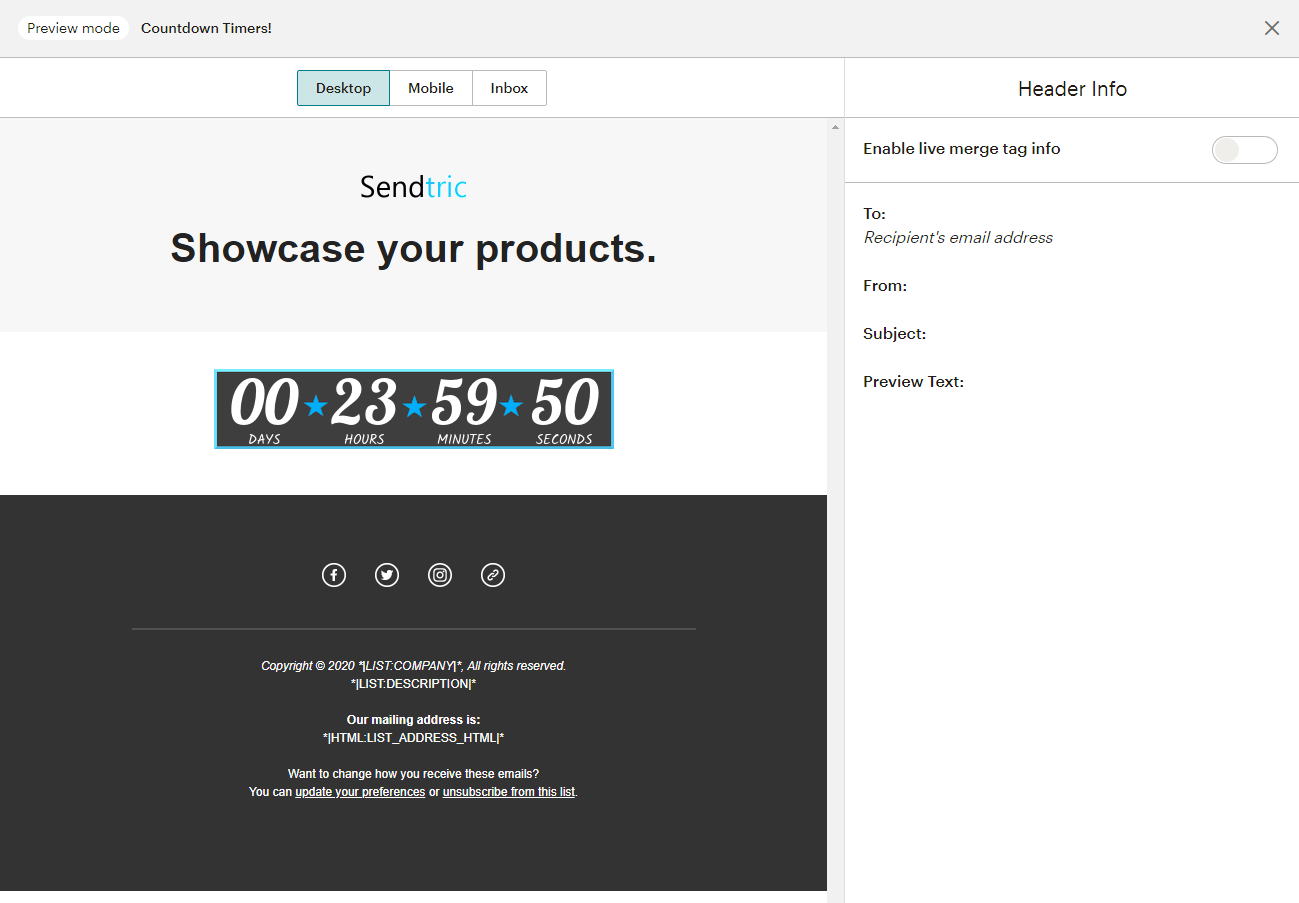
4. Enter Preview mode (press 1 on the keyboard, or click “Preview” at the top of the page) to confirm the timer is configured correctly. Note that the editor preview does not evaluate the date tag in real-time, so entering preview mode is recommended to confirm the end time is correct: